A patio can look perfectly sound from across the yard, then catch your toe the moment you walk across it. A low spot beside a front stoop can hold water after every rain. Knowing how to level sunken pavers helps you correct the trip hazard, restore the appearance of the surface, and keep a small repair from becoming a larger drainage or base problem.
Pavers are designed to move slightly as the ground changes, but noticeable settling is not something to ignore. In New Jersey, freeze-thaw cycles, heavy rain, clay soil, and poor runoff control can all shift the material beneath a patio, walkway, driveway, or pool deck. The paver is usually not the real problem. The support underneath it is.
Find Out Why the Pavers Sank First
Before lifting a single paver, look at the area around the low spot. If the surface settled near a downspout, a roof valley, a driveway edge, or the bottom of a slope, water is likely part of the issue. Water can wash out bedding sand, soften the soil below the base, or find its way along the edge restraint and carry material away.
Settling can also happen when the original base was too thin, poorly compacted, or installed over unstable soil. On a driveway, the weight of vehicles may expose a weak base that a foot-traffic walkway could tolerate for years. On older patios, tree roots and repeated freezing can raise and lower sections until the joints loosen and individual pavers drop.
Check whether the problem is isolated or widespread. One or two sunken pavers near a downspout may be a straightforward repair. A patio with several low areas, spreading gaps, loose edges, and standing water usually needs more than a quick lift-and-add-sand fix. Covering a base failure with more bedding sand can make the surface look level for a short time, but it will settle again.
Tools and Materials for a Small Paver Repair
For a limited repair, you will generally need a flat pry bar or paver puller, rubber mallet, shovel or hand trowel, straight board, level, tape measure, plate compactor or hand tamper, bedding sand, joint sand, and safety gloves. Keep extra matching pavers on hand if any units are cracked or badly worn.
Use the right material in the right layer. Bedding sand is used for final adjustment under the pavers. It is not a substitute for compacted aggregate base. If you uncover soft soil or missing stone beneath the sand, you will need properly graded aggregate to rebuild that support before reinstalling the pavers.
Check the Slope Before You Start
A level-looking surface is not always truly level. Patios, walkways, and driveway sections need intentional slope so water moves away from the home, garage, and other structures. A common target is about one-quarter inch of fall per foot, although the correct slope depends on the layout and where runoff can safely drain.
Set a straight board across the surrounding pavers and use a level to see how far the depressed section sits below the finished surface. Then check the direction of the existing grade. The goal is to blend the repair into the surrounding pavers while preserving drainage, not simply make every point dead flat.
How to Level Sunken Pavers Step by Step
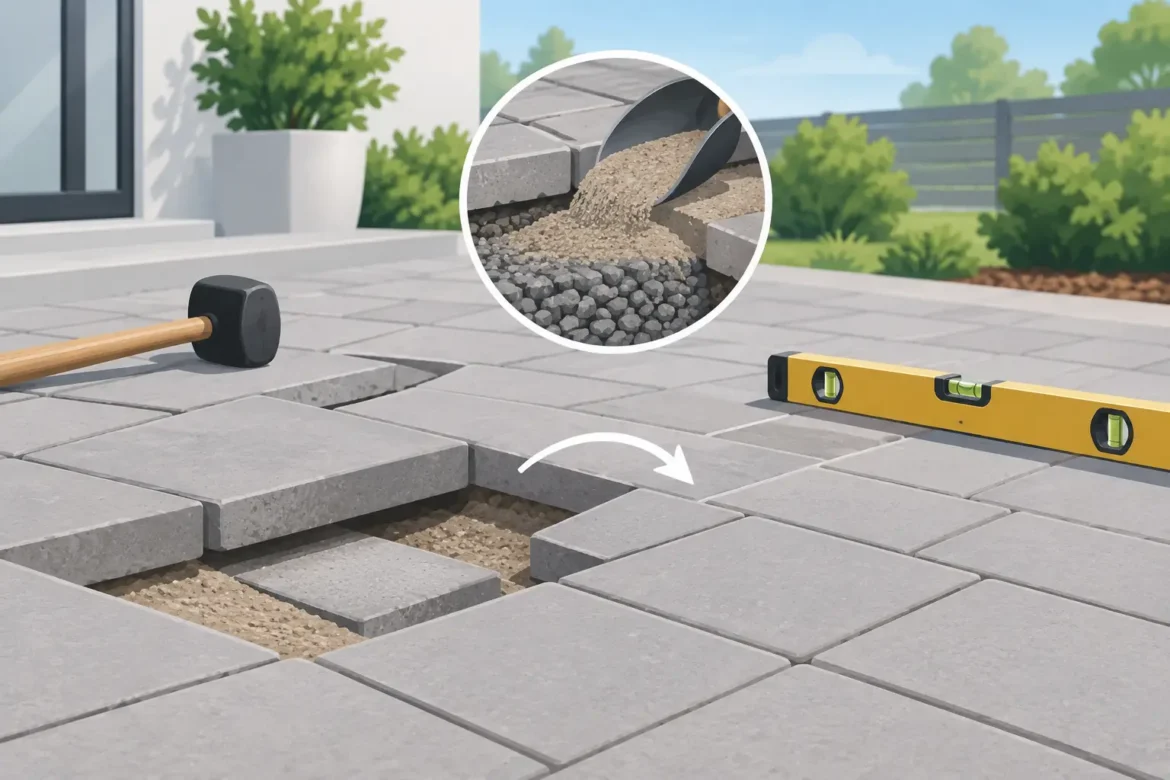
Start by removing the joint sand around the affected pavers. A narrow screwdriver, joint tool, or stiff brush can help clear the joints enough to lift the first piece. Work carefully from the edge of the low area if possible. A flat pry bar can lift a paver, but protect adjacent units from chipping by using a small piece of wood as a fulcrum.
Once the first paver is out, remove the rest of the settled section and set the pieces aside in the same general pattern. This matters with blended colors, tumbled pavers, and patterns such as herringbone or basket weave. Photographing the area before removal can save time during reinstallation.
Remove the loose bedding sand below the pavers. If the sand is wet, muddy, or missing in places, keep digging until you reach stable material. Inspect the aggregate base. A firm, properly compacted base should not be soft under pressure or broken into loose pockets.
If the aggregate is sound and the settlement is minor, add a small amount of clean bedding sand and screed it evenly. Do not create a thick mound under one paver. That paver may rock, shift, or crack when stepped on. Build the surface in thin, even layers and test the height frequently.
If the base is low or unstable, remove enough material to rebuild it. Add aggregate in compactable lifts, generally no more than a few inches at a time, and compact each layer thoroughly. For a small walkway repair, a hand tamper may be adequate. For a larger patio or driveway repair, a plate compactor provides more consistent results.
After the base is firm and graded correctly, place a thin, even bedding layer over it. Screed the sand with a straight board so it follows the required slope. Reinstall the pavers, tapping them gently into place with a rubber mallet. Use the surrounding pavers and straight board as your guide. The repaired section should sit flush, without a raised lip or a low edge that catches water.
When every paver is in place, sweep joint sand into the gaps. Compact the surface if appropriate for the paver type and repair size, then sweep in more sand until the joints are filled. Polymer-modified joint sand can help resist weed growth and washout when installed according to the product directions, but it will not solve a base or drainage problem by itself.
Do Not Ignore Drainage Around the Repair
Many paver repairs fail because the settling was treated as a surface issue instead of a water issue. If a downspout empties directly onto a walkway, redirecting that water may be more valuable than replacing the pavers. If a patio slopes toward the house, regrading or adding a drainage solution may be needed before the next hard rain pushes water where it does not belong.
Look for signs of active water movement: washed-out joint sand, dirt staining between pavers, green algae in low spots, soil erosion along edges, or puddles that remain long after a storm. These are practical warnings that the area needs better runoff management.
Edge restraints deserve attention as well. Pavers rely on solid perimeter restraint to stay interlocked. When an edge shifts outward, the field of pavers can spread, joints open, and sections begin to settle. Repair or replace loose restraint before reinstalling the surface.
When a DIY Repair Makes Sense
A homeowner can often handle a small, dry, isolated depression in a pedestrian walkway or patio, especially when the base is still firm. Take your time, check the grade, and avoid the temptation to add loose sand directly on top of a failed base.
It is wiser to call a professional when the affected area is large, the pavers support vehicles, water is moving toward the foundation, or the surface has settled more than once. Driveways need deeper, stronger bases than patios. Areas near retaining walls, steps, pool decks, and foundations also require more careful judgment because drainage and structural conditions can be tied together.
Bentley Paving & Masonry evaluates the condition below the pavers, not just the visible low spot. That approach helps homeowners and property managers make a repair that fits the cause of the problem, whether it is a localized base correction, edge repair, drainage work, or a larger paver restoration.
Keep the Surface From Settling Again
After the repair, keep joints filled and watch how the area performs during rain. Clean debris from nearby drains and avoid directing roof runoff across paver surfaces. If you notice fresh movement, widening joints, or recurring puddles, act before the affected section grows.
A well-built paver surface should feel solid underfoot, drain as intended, and look like the low spot was never there. The best repair is not the one that simply raises the pavers for the day. It is the one that gives water a place to go and gives the pavers a stable foundation to stay put.